Birthday party is exciting but resources driven event where you need to plan in advance all the details like place for the party, decoration, food, entertainment part, loot bags etc. One of the simple and non-expensive way to add some sparkles to your event is to make glitter tattoos for the kids. This type of tattoos come in different colors and shapes, intended to stay for a few days even when washed. They can be easily removed with the oil-based products such as eye make-up remover, baby oil or rubbing alcohol if needed. Kids of all ages love them!
Materials
In order to make glitter tattoos, you will need the following:
- Stencils
- Body Glue
- Glitter Body Powder
- Two brushes (one for applying glitter, another one for cleaning at the end)

You can buy everything separately or as a set.
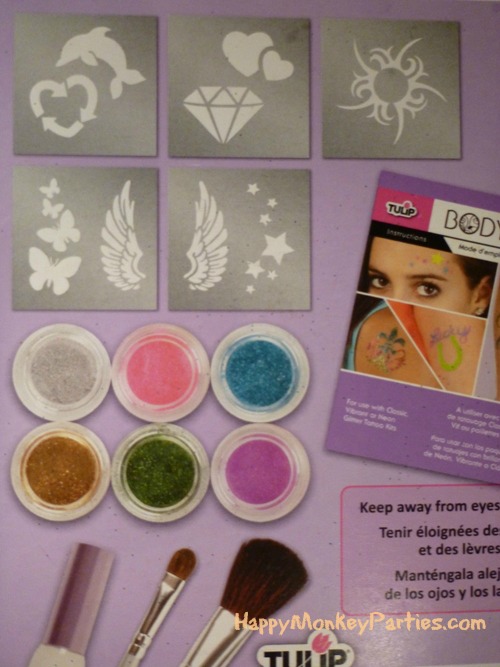
I use Tulip Body Art set for my clients. It contains 5 stencils that can be used multiple times, 6 basic colors of glitter, body glue and two brushes – all you need to start making glitter tattoos right away.
Here is how it looks when opened.
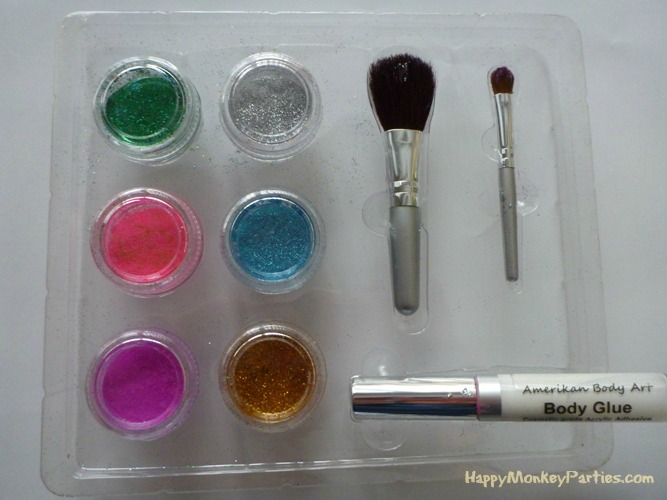
Please note that on the picture is not an original body glue that comes in the Tulip Body Art set, but another one Amerikan Body Art glue I’ve recently bought.
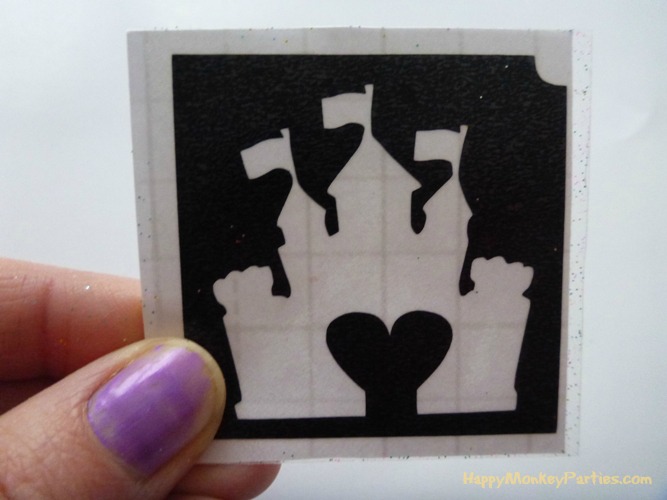
You can get plenty of different stencils particularly for your birthday party theme or for other event. There is a big variety of them. If you have some art skills, you may want to try and draw something yourself, or write something simple like child’s name, for example. Just keep in mind that body glue is white and turns clear very quickly, you will not be able to see your drawing until you apply glitter.
Step 1
Remove protective slides on the top and bottom of your stencil and stick to the part of the body where you plan to have glitter tattoo.
I found that stencils from the set could be used multiple times, where the stencils I’ve bought separately were good for only one time usage.
Step 2
Apply body glue. Do not put too much though as it can go beyond the borders of your stencil. Thin layer is more than sufficient.
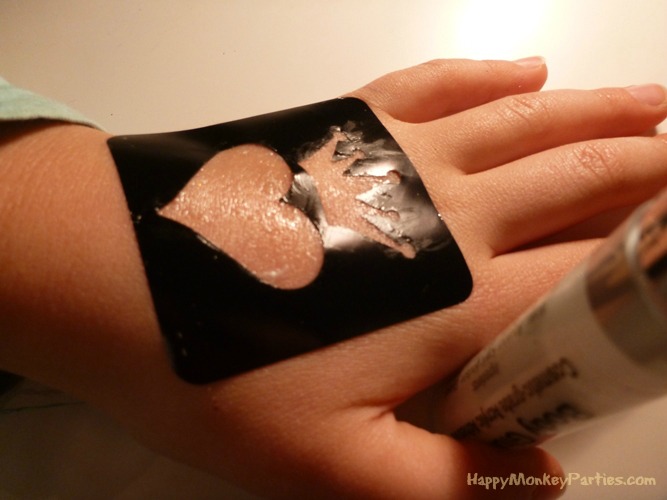
Step 3
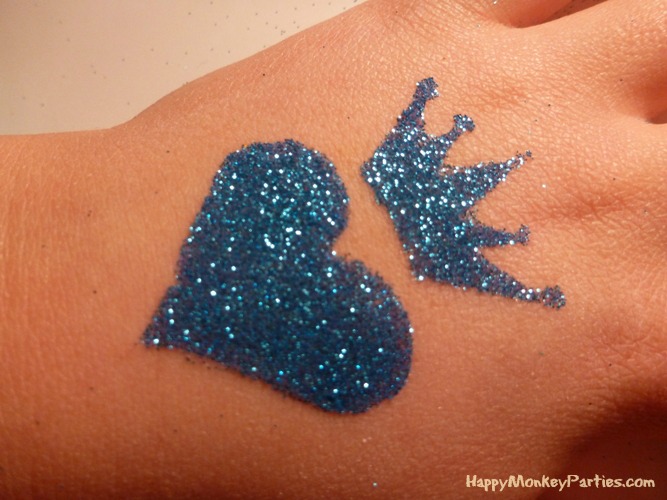
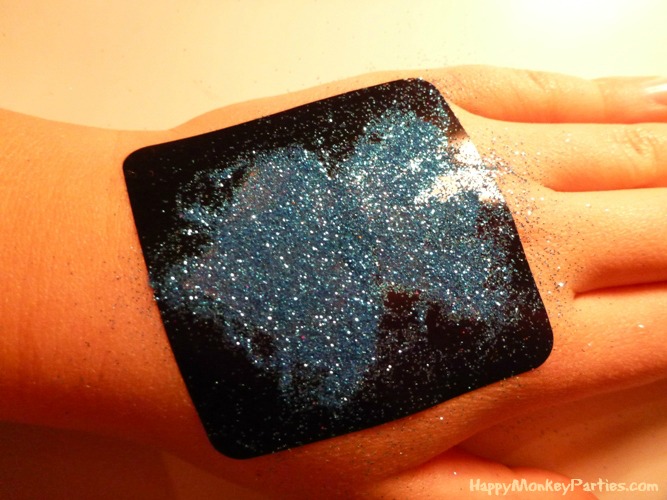
Add glitter using small brush. You can use different colors of glitter. Make sure to shake off extra glitter from your brush each time you plan to use different color so they don’t mix up a lot. Here is the result you get. Doesn’t look attractive for now, but be patient, your efforts will pay off.
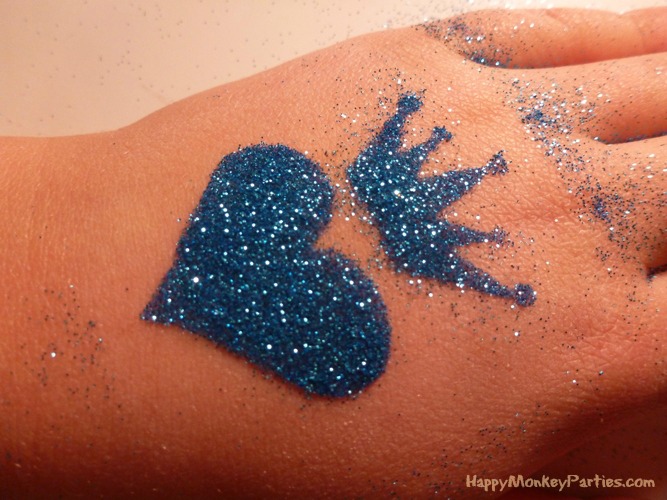
Step 4
Gently remove the stencil. I haven’t heard any complaints from kids, it doesn’t heart them, and all the hair stays in place. I usually ask the child: “Are you ready?” to prepare for the magic.
Well, now it looks better!
Step 5
Remove extra glitter with large brush.
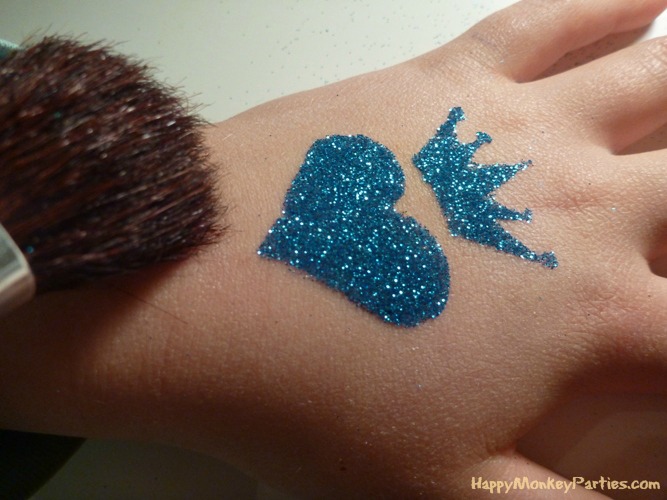
Now look at the smile on child’s face! Quickly, get the camera to capture this priceless happiness!
Will kids remember your birthday party at least tomorrow? Definitely! They have a proof now of the time well spent – water resistant sparkling tattoo of their personally chosen design.
Disclosure: Please note that this post contains affiliate links. We share information about products we like ourselves enough to recommend to our valuable readers.

Leave a Reply